

How to Cure Rosin Using an Ultrasonic Cleaner

In the ever-evolving world of cannabis extraction, enthusiasts and professionals alike are continually exploring innovative methods to enhance their post processing methods for rosin. One of the most popular techniques is referred to as cold curing. Cold curing rosin consists of storing a sealed jar of rosin at around 50-70 degrees Fahrenheit. This process typically takes anywhere from a few days to a few weeks before the full range of nucleation has occurred. Extractors cold cure rosin to make it more stable and easier to package.
One technique gaining popularity to speed up this process is the use of an ultrasonic cleaning device. This groundbreaking process utilizes the power of ultrasonic waves to nucleate your rosin in just a couple of hours. In this article, we'll delve into the step-by-step guide for ultrasonic curing jars, ensuring optimal results for cure.
What is an Ultrasonic Cleaner?
Ultrasonic cleaners utilize high-frequency sound waves to create microscopic, high-energy bubbles in a cleaning solution. These bubbles form and collapse rapidly in a process known as cavitation.
What You Will Need to Cure Rosin Using Ultrasonics
- Ultrasonic Cleaner
- Water Chiller (Option for professionals)
- Rosin
- Jar
- Water
- Ice
- Whipping Tool
Step 1: Preparation
To begin the process, fill a jar with rosin and securely seal the lid. The quality of the jar and lid is crucial for maintaining airtight conditions during the curing process, ensuring the preservation of valuable terpenes. Make sure your jars are properly cleaned before starting.
Step 2: Setting up the Ultrasonic Cleaner

Place the sealed jar inside an ultrasonic cleaner and carefully fill it with water until the level of rosin and water are equal. This step is fundamental in providing a medium for the ultrasonic waves to propagate efficiently through the rosin, aiding in the curing/nucleation process.
Step 3: Powering On the Ultrasonic Cleaner

Turn on the ultrasonic cleaner, but it's essential to note that for this particular process, the heat function should remain off. Ultrasonic waves alone are sufficient to activate the necessary reactions for effective rosin curing.
Step 4: Temperature Control
Maintaining a specific temperature is crucial for achieving the desired results. Add ice slowly to the water to regulate the temperature within the jar. For optimal cold curing, aim to keep the temperature around 70 degrees Fahrenheit throughout the process. This controlled temperature ensures the preservation of delicate terpenes, contributing to the overall quality of the rosin.
Optionally, you can also purchase a simple and cheap water chiller. This recirculates the water through the tank and chiller, keeping the water at your desired temperature. This allows the process to be truly passive, where you can walk away for over an hour, and not have to worry about your hash overheating!
Step 5: Nucleation Stages
As the ultrasonic waves work their magic, observe the rosin as it goes through the various stages of nucleation. This process is essential to achieve the desired wet texture people seek in cured extracts.
Step 6: Removing the Jar
Once the rosin has completed all stages of nucleation, carefully remove the jar from the ultrasonic cleaner.
Step 7: Homogenization
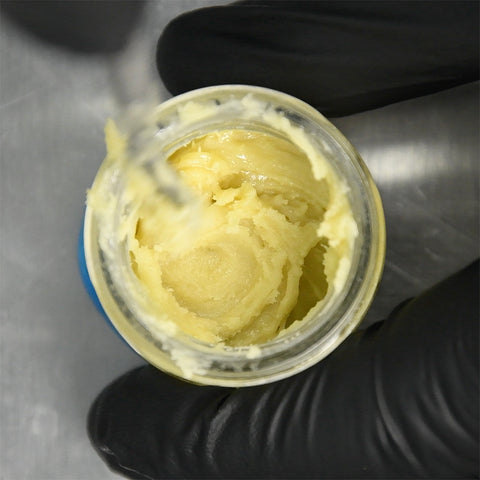
To complete the process, whip the rosin product to homogenize it. This step further refines the texture and consistency of the final product, resulting in a wet and shelf stable consistency.
Conclusion
Ultrasonically curing jars has revolutionized the rosin curing process, offering a method that preserves the integrity of your terpenes. By following the step-by-step guide outlined above, you can unlock the full potential of ultrasonic cold curing, ensuring a top-tier rosin that meets the highest standards of quality in the ever-growing cannabis market.